Wednesday, August 30, 2023

Camo Carpet...

We occasionally joke about our "Camo Carpet."  It really isn't bad and it cleans up pretty nice, but we'll be glad to be rid of it when the time comes...

...And so starts the flooring project.  Regular readers of this blog will realize that while my intent was to finish the kitchen in August (and it's the 30th) that concept was delayed when it occurred to me that it wouldn't do to set the cupboards before I put the flooring it.  (Just one more foible of DIY work: proper planning).

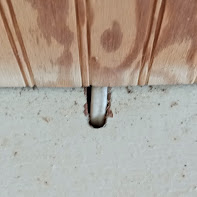
So last week I spent some time squaring up the long sides of the lumber for this project and sorting the boards by size. Today's project involved sorting through those piles and selecting the boards with which I would start.  Having make the selection I set to squaring the ends and stacking the (almost) finished boards inside to allow them to adjust to the temperature and humidity. But first I had to cut into that wonderful camo carpet to clear the way for the boards to come inside. And that led to some questions such as: "What do these blue squares on the floor indicate???"

Of course there are other burning questions such as "Why was the electricity was run a certain way?" and "What is the best work around?"

And amidst all of this, I need to give great credit, yet again, to my amazingly patient wife who lives in this house which is constantly under construction or reconstruction,  I mean, really, what woman would allow her living room to be turned into a flooring factory?
 
And so the first section of the flooring is stacked.  I'll do a final check on the moisture content before laying.  
 
The final decision I need to make is just how I'm going to fasten the boards. Carol's Uncle Allan did a beautiful job on an old stone farmhouse in Perkasie, PA using standard cut nails (from Tremont Nail Co.)  But I'm vacillating between that and using black head screws which would be counter sunk and then covered with dowel rod plugs/buttons cut to surface level.
 
In the meantime I'll be able to get back to work on the kitchen as the mounting brackets for the microwave as suppose to arrive tomorrow...finally.  The refrigerator is still a week out...and none of the shelving cupboards can be built or installed until all of this in done.  It's going to be a long fall...The projects just keep piling up like this wood.


Tuesday, August 22, 2023

Making Sawdust


First and foremost let me acknowledge the fact that without my father-in-law, Walt Doelp's, patience and influence on this non engineer minded, non mathematically inclined son-in-law and his most kind gifting of this amazing table saw, this post would not be being written.

So too, a shout out to Jake West of West Branch Lumber  whose work as a sawyer makes just such things happen for many of us! And now for the rest of the story...

+ + +

My father-in-law's typical response to the question "what were you doing in your shop?" was always "making sawdust" hence the title of this particular post. 

The good news is that we are getting closer and closer to being able to put down the floor at 12MonksHill.  As I was working on the kitchen (blogpost in the works...) the thought occurred to me, "I can't put the cabinets in until I put the floor down.  I don't want to have to pull and reset them." And so like an ADHD laden child I swiftly reorganized and built a wood storage shed.  Stay with me, there was a method to my madness.  I needed a staging area for the lumber that I had purchased this winter (Blog Post Here) and which had been drying mostly under cover on the driveway. It had dried sufficiently but I needed to stack it and stage it so that I could attend to straightening the cuts and dressing up the edges in preparation to  lay it.

I came up with a floor and roofing system that tied together the wood shop and the firewood storage shed. The  frugality of my father, who taught me to straighten rather than cast off bent nails, kicked in and I found sufficient scrap lumber, left over roofing paper and joist hangers to make this possible.  (When I've finished with it as a staging area, I'll add doors and it will become a winter storage shed for the outdoor furniture and bicycles. In the meantime I'll have safe place to store wood & keep my shop from becoming over cluttered.)

I started stacking all of the lumber in there not thinking that I could sort it and get a head start. But fill it, I did with the dried lumber and the stickers seen in the foreground (pic above left). 

And then, this morning the work began.  I pulled and sorted the lumber. 12'-1x12's, 10'-1x12's, 8'-1x12's, 12'-1x10's, 10'-1x10's, 8'-1x10's, 12'-1x8's, 10'-1x8's, 8'-1x8's, and 8'-1x6's.  I needed to do this as I would be cutting the long edges to square and then the second side to exact dimensions. 

I didn't want to have to reset the fence and risk losing the exact width guage for each size board.

And then I set to ripping...and ripping...taking a quick lunch break after the first side of all the boards were cleaned up and straightened. (Remember this was all rough cut lumber.)  And then after lunch it was back to ripping...and ripping. The 12 footers were a bit much to handle in getting them ripped nicely but perseverance paid off...I hope. The picture at the top of this post shows the final result of the cutting.  8, 5 gallon buckets (and a bit more...) of sawdust, most of which will be used to make compost or used as a weed barrier in the garden.

The end result is 52- 8-12' 1x12's; 31- 8-12' 1x10's, 18- 8-12' 1x8's, and 10- 8' 1x6's (and a few assorted "shorties" (4'-6' of each) to make sure the seams don't line up.  All-in-all about 1000 sq ft of flooring.

Of course I still need to square the ends before I lay them, tear up the carpeting, mark the floor joist lines, and figure out how to move the kitchen, dining room, and living room around while I install, sand, stain, and oil all of this.  The joys of an open floor plan.  And then, I can finish the kitchen.  

One last thought, either because of my
obsessiveness or because I believe God is a god of order and not chaos, I took the scraps from edging the boards and cut and broke them into 12-18" pieces and bundled them up as kindling.  Maybe sell them on an FB Marketplace/Yardsale site???

So that's how my day went.  Blessed by the Lord beyond measure.  I hope yours was just as blessed.  If you get the chance why not drop a comment and let me know whether or not it's worth my time to keep this blog going.  We could all use a little encouragement from time to time.


Saturday, August 19, 2023

Two Year Check Up

I was exhausted the other day (a by product of aging, I suppose).  While I was waiting on the kitchen paint and wood oil to dry I had started to construct a wood storage container, adjacent to my shop, in which I could keep all the insulation, T&G, firring strips and trim, etc.  After coming in and collapsing with the computer to consider what I would write about next, I told Carol, "I really ought to review the pictures from the time we bought the place to see how far we've come.  Maybe that will help me stay motivated in this project and finish well.  

And then the thought occurred to me "why not put them up where I can see them without having to scroll through endless files?"  Hence this post.

While I'm finishing up the kitchen (I still have the cabinets/shelving to build and the trim work to do) I'll take a couple of evenings to organize these for my own selfish interest... 

(Just a note that any picture may be clicked on to enlarge and/or to be able to scroll through the pictures.)

2021                                                        2023                                   


2021                                                        2023                                   


2021                                                        2023                                   


2021                                                        2023                                   


2021                                                        2023                                   


2021                                                        2023                                   


2021                                                        2023        


And Currently...in progress (Don't mind the 25lbs of Roma tomatoes.  Spaghetti sauce is in the making.)

2021                                                        2023       


Friday, August 4, 2023

The Doors (not the rock group)

With all the busyness of summer, this one especially occupied with a visit from the Thailand piece of the family and a "first swim" in the pond, I missed updating the 12 Monks Hill blog about the work with doors.

We've been vacillating with doors.  What kind? What color? Reuse?  But the decisions were made and work undertaken.  We continued the concept of the plank door (what I call the outhouse look) that we used for the bathroom for the utility room and will continue that for the Master (yes, I used the word😜) Bedroom.  The utility room door, however, took a twist with my wife's wonderful sense of humor.  A friend (Sharon) had  given her a plaque about bears and when we found a bear claw at some other friends' (Sam and Joann) garage sale it was a match made in heaven (or at least in her mind).

And then, for the den, in honor of grandchildren in general this door, which opens into the kitchen, was the perfect place for a blackboard and so we repurposed a recently purchased screen door into just such an item.  I'm hoping to see the weekly dinner menu posted from time time..

(All the doors are receiving a European style high knob/ entry hardware, primarily, to provide the grandchildren with less easy access to places they don't need to go!)

Finally, there was the issue of screen doors.  A must.   My amazing wife LOVES the sound of a screen door banging announcing the arrival of, well, most anyone.  It's reminiscent of Grammy and PopPop's, Grammy and Pappy's and, for me, my own home and that of my dad's parent's home.  There is just something about a screen door smacking the frame that yields warmth, friendship, family, and simplicity.

But how to tie that in with the board and batten siding look...One of the screen doors we had prior to the residing project could be reused and that helped to set the stage for both.  It was simply a matter of removing the lower screen and putting in some plywood, in one case, and some left over Larch I had picked up from Jake West in the other.  A bit of stain, some 14" springs, an eye and hook, and voila!


So that was about all that got done in July. But is was a month filled with love, laughter, good times, and a bit of work.  Thanks be to God!

Wednesday, August 2, 2023

Deconstruction has begun...

 Is dinner ready?

So the kitchen project has begun. Spring lines, pond digging, siding projects, new windows, etc are behind us and the bulk of the interior work awaits.  The floor plan includes a 900 sq ft open concept living, dining, kitchen area.  It's actually one of the things that attracted us to this diamond in the rough.

The five banks of 8' florescent tube lights have been removed and some initial electrical rewiring/relocation has taken place.  

But TODAY marks the beginning of the actual deconstruction phase.  I'll remove all the fancies (like shelving with the mantle clock, soap stone chicken, spice racks, and other "necessities," relocate some of the racks for the pots and pans, the coffee maker, etc.  And then begin tearing out the wainscot panels that were likely installed to cover up the foam board installation in preparation for listing it for sale.

The wall pictured above will get sheet rock and paint as an accent wall and the rest of the kitchen/dining/living walls will continue the pine tongue and groove motif.  

My goal in this is to disrupt the cooking, etc activities as little as possible so I'll need to temporarily re-plumb the sink in order to keep it operative.  This will be interesting so keep checking back for updates... 


Finishing Touches...

While there still remain a few bits and pieces of trim work to do the majority of the renovations are complete. Sure there are a few trim pi...